Chatglm2_6b安装
一、安装要求
1、硬件
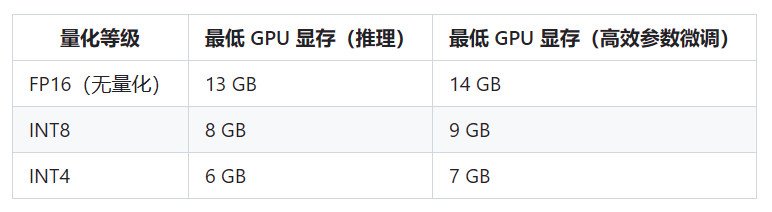
能否使用,或者以什么模式使用主要取决于显卡的显存
2、能否使用AMD显卡?
可以,甚至可以使用CPU,但是需要降低精度。
以CPU模式运行大概需要32GB 内存。
二:工程与下载
工程路径:
一代工程:
https://github.com/THUDM/ChatGLM-6B/tree/main
二代工程:
https://github.com/THUDM/ChatGLM2-6B
模型路径:
一代模型:
https://huggingface.co/THUDM/chatglm-6b
二代模型:
https://huggingface.co/THUDM/chatglm2-6b
考虑到我们的网络情况,估计有大把的人是无法正常下载的
所以将工程文件与模型整合到一起
链接:https://pan.baidu.com/s/1CxgeUQSXUX__YtMUoSPeUw?pwd=eybi
提取码:eybi
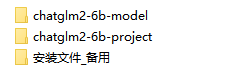
文件夹分为3个包
【chatglm2-6b-project】中是工程文件
【chatglm2-6b-model】是huggingface上的模型文件
【安装文件_备用】中可能用到的安装文件,如果没有安装的,可以安装一下。
链接:https://pan.baidu.com/s/1XjJf8iYJczBoWXS4jznXug?pwd=1b62
提取码:1b62
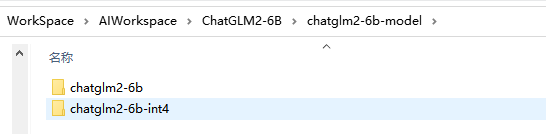
此时,chatglm2-6b-model中有两个文件夹
【chatglm2-6b】是标准模型文件
【chatglm2-6b-int4】是量化后的模型文件
三、安装
1、机器学习的基本安装方法
http://cyberxz.com/aiweb/note/00400301_Setup_Win/00400301_Setup_Win.html
*启动前请务必按照该文档安装基础的软件与配置
2、安装ChatGPT
如果使用webui,则需要安装Gradio,命令:
四、运行
1、设定时要修改的文件
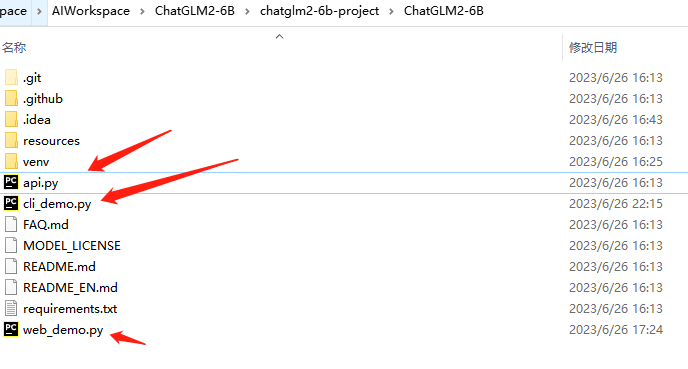
工程目录下的3个.py文件,要运行哪个就修改哪个
2)具体采用哪种模式请根据自己的硬件决定;
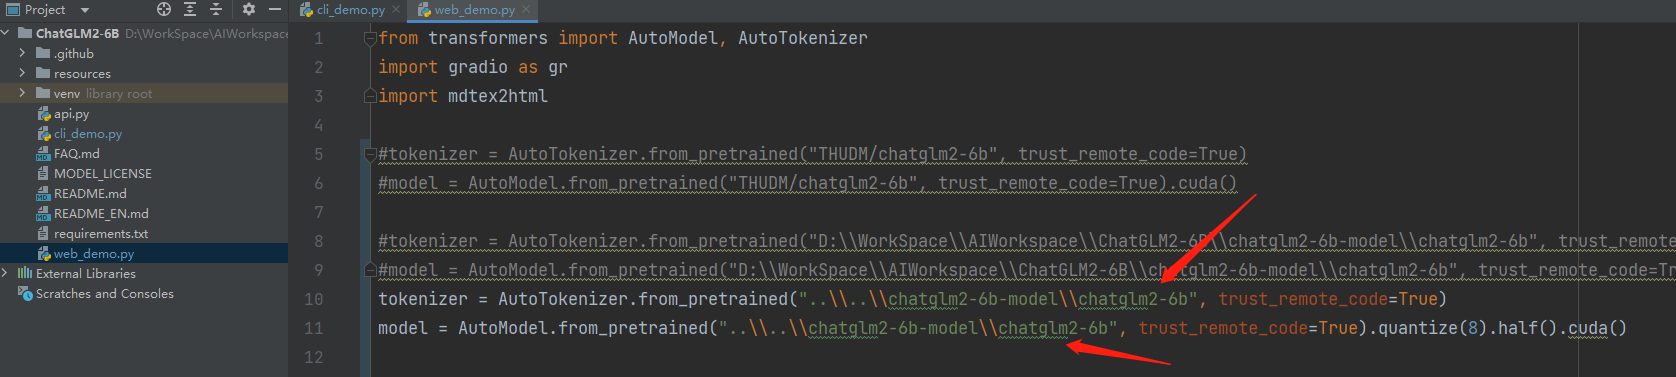
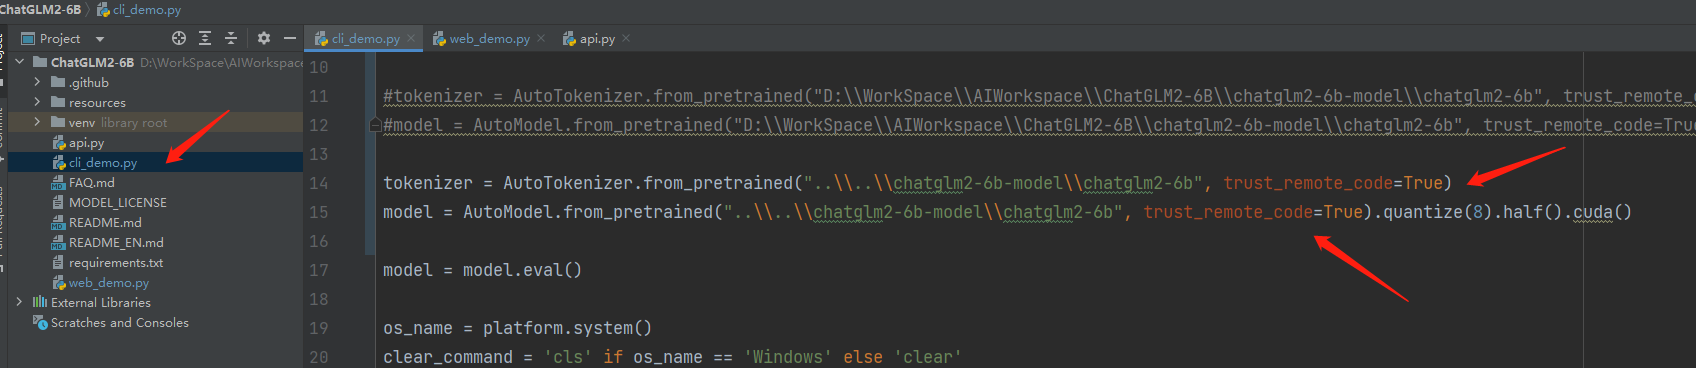
2、设定模型的路径
tokenizer = AutoTokenizer.from_pretrained("..\\..\\chatglm2-6b-model\\chatglm2-6b-int4", trust_remote_code=True)
model = AutoModel.from_pretrained("..\\..\\chatglm2-6b-model\\chatglm2-6b-int4", trust_remote_code=True).cuda()
3、GPU运行
tokenizer = AutoTokenizer.from_pretrained("..\\..\\chatglm2-6b-model\\chatglm2-6b", trust_remote_code=True)
model = AutoModel.from_pretrained("..\\..\\chatglm2-6b-model\\chatglm2-6b", trust_remote_code=True).cuda()
int8:
tokenizer = AutoTokenizer.from_pretrained("..\\..\\chatglm2-6b-model\\chatglm2-6b", trust_remote_code=True)
model = AutoModel.from_pretrained("..\\..\\chatglm2-6b-model\\chatglm2-6b", trust_remote_code=True).quantize(8).half().cuda()
int4:
tokenizer = AutoTokenizer.from_pretrained("..\\..\\chatglm2-6b-model\\chatglm2-6b", trust_remote_code=True)
model = AutoModel.from_pretrained("..\\..\\chatglm2-6b-model\\chatglm2-6b", trust_remote_code=True).quantize(4).half().cuda()
4、CPU运行
如果你没有 GPU 硬件的话,也可以在 CPU 上进行推理,但是推理速度会更慢。使用方法如下(需要大概 32GB 内存)
tokenizer = AutoTokenizer.from_pretrained("..\\..\\chatglm2-6b-model\\chatglm2-6b", trust_remote_code=True)
model = AutoModel.from_pretrained("..\\..\\chatglm2-6b-model\\chatglm2-6b", trust_remote_code=True).float()
如果你的内存不足的话,也可以使用量化后的模型
tokenizer = AutoTokenizer.from_pretrained("..\\..\\chatglm2-6b-model\\chatglm2-6b", trust_remote_code=True)
model = AutoModel.from_pretrained("..\\..\\chatglm2-6b-model\\chatglm2-6b-int4", trust_remote_code=True).float()
5、运行
与官方文档一样,在【ChatGLM2-6B】(工程目录)下运行